DISCLAIMER: I AM NOT A PRO [yet]. any actions you take based on my post will invalidate any
UL listing on your materials and can possibly be a fire hazard. but then again, it probably cant be worse than it was.
also, PG-13. i swear a lot. get over it or find a different site to read. and yes i know my nails look like crap and my fingers are all cut up and dry. wiring lab + winter + washing hands a lot.
aint nobody got time fo that.
this is a lamp.
i love lamp. no not really. this lamp used to be an oil burning thinger with a fancy glass chimney that held up the ancient lampshade. before safety restrictions and the like, it was rewired with some ancient cord, and somewhere between the move from iowa to maine, the glass chimney was sent to narnia. i was given the pieces of the lamp with the exception that i would
paint/modpodge/rewire or otherwise fix it... or donate it to goodwill for someone else to play with. a semester into my electrician training, ive got simple wiring down pat. or so i thought.
step 1: take lamp to home depot and ask electrical department head [my weekend boss] what parts i need. we discussed strategies for a bit, and ended up dismantling the top of the lamp, only to find the lamp kit parts we had on hand werent quite right. i decided on a brass socket to match the lamp, and a white cord to match the rest of my house.
next, take the top of the lamp apart again.
see the old wiring? some of the contacts are a bit corroded and well frankly, the cord is older than i am. cut that shit apart and pull the cord pieces out of the lamp. now you have a short old cord and a bulb fitting.
cut the end off your extension cord, thus completely invaliding the united laboratory rating for an extension cord and well you might as well remove the safety warning tags at this time too. they just dont look fancypants on a lamp.
at this point you may want to remember what side is what on the plug. heres a hint. dont feed it painstakingly through the lamp and start to wire it BEFORE you know which side of the cord is hot [electrified] and which is neutral.
now at some point in my wiring class i vaguely remember something about translucent lamp wire and how you can see writing over the hot conductor. welp opaque cords also have writing but it is incredibly hard to find, but yes it is over the hot conductor/wire/side. which lined up with the small [nonpolarized] side of the plug. just to verify, i busted out one of my fun wiring toys - the receptacle tester.
wide side - neutral. narrow side - hot. and it beeps and flashes in case you didnt realize you were measuring something. granted, you cant do this with new receptacles now since they are childproofed so little johnny doesnt stick scissors in the outlet. welp he would only do it once... but now he doesnt have that chance. anyway.
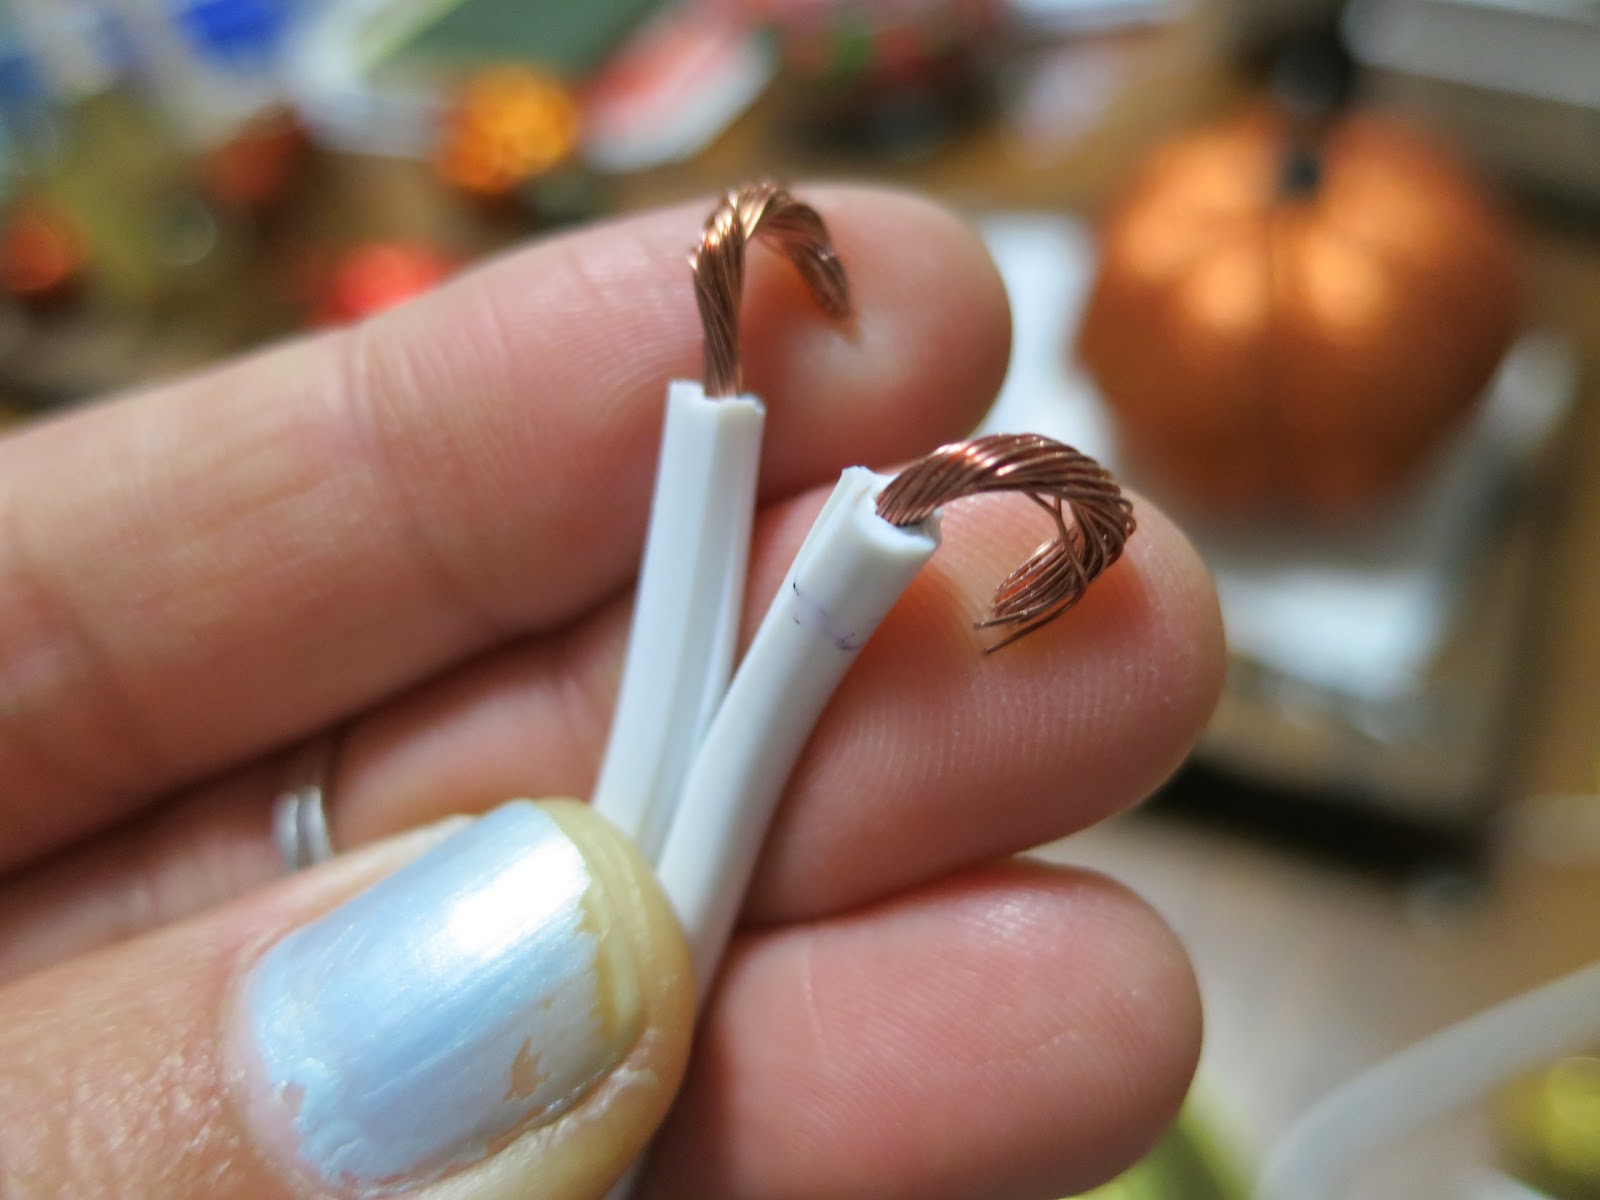
strip the cut ends of the wire. leave about an inch of free conductor. i did this and then carefully separated the neutral and hot conductors with a knife. separating them first makes wire stripping ...significantly easier. but whateves.
twist all the little copper wires together clockwise, and carefully make half loops at the end. dont worry. you'll have to do it about 14 times before it stays and looks even half decent. then the tricky part. hook the wire loops under the screws on the socket clockwise, so when you tighten the screw they turn with the screw, thus self-tightening. because an extension cord doesnt have traditional conductor wire, the individual copper guys untwist themselves and try and escape the screws. repeatedly. but twist that shit on anyway.

and then, if youre a perfectionist like i occasionally am, unscrew the contact screws, retwist the conductor wires, and do it again so none of the little copper bits are flailing about. then swear all the swears cos you forgot the bottom of the friggin light socket. see the part that actually conducts electricity is the black plastic bit. it is protected by some cardboard [?] insulation with a brass bottom and sides. weeeell i forgot the bottom bit so there was nothing for the sides to attach to.
unscrew contacts, add bottom piece, reconnect conductors. attempt to attach lamp to base and... FUCK. IT DOENST FIT. sooooo disconnect all that ish again, see if the sides of the lamp socket will attach to actual lamp, and voila! replace the old nasty cardboard with the newer one, discard the bottom of the socket, and reattach the conductors to the socket.
see how nice that looks? 8th time is the charm. trust me.
old bits of nasty
new lamp socket and wiring attached firmly to old base. attempt to reattach old fancy parts of lamp - these are where the fire would have shown back in the day. theyre also in the first and second pics if you scroll all the way up. pop those bad boys on and NOOOOOO THE SWITCH DOESNT ATTACH? ARE YOU EFFING KIDDING ME?
take all apart again. swear. stomp around for awhile. try and reattach old nasty parts with new wiring and redo loops and contact points. notice switch is still to high for fancy parts to attach correctly. curse. create new highly creative phrases. scare cat away.
carnage.
also, some tools that are very helpful - utility/craft knife, flat and philips screw drivers, needle nosed pliers, wire snips, wire strippers, receptacle tester, hammer. always a hammer.
test with whatever bulb is on hand. IT FUCKING WORKS! celebrate with candy. then ponder what to do without fancy parts or a lampshade. concede ... a
super schmancy non-efficient short-lived incandescent bulb would look pretty boss but its too late to go to the store now. ponder taking up low voltage welding in order to add lamp parts back on. admit partial defeat. go to bed.


No comments:
Post a Comment